
Excel library
How to Keep a Cell Blank with Formula in Excel?
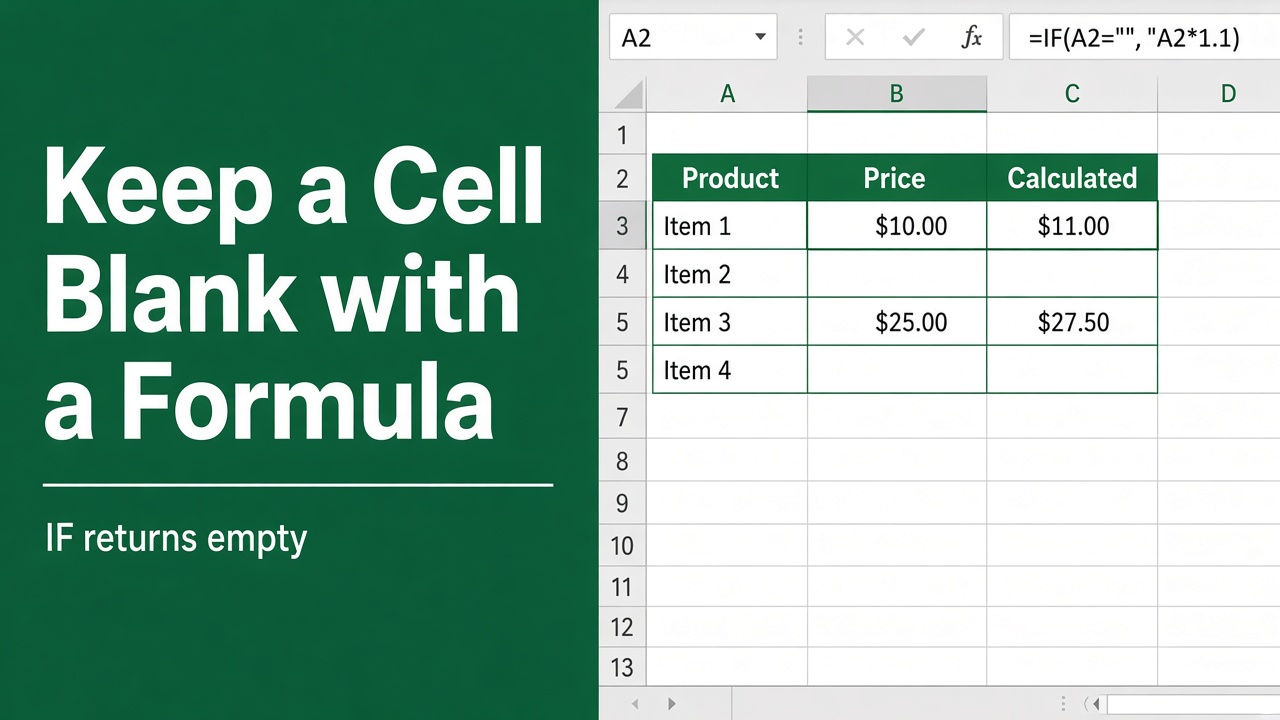
Have you ever needed to keep a cell blank in Microsoft Excel, even when a formula would normally display a result in that cell? There are a few different ways to do this using formulas and functions in Excel. In this article, we’ll cover several methods for keeping a cell blank with a formula, including using the IF function, ISBLANK function, and more.
Wrap the formula in IF and return an empty text string "" when the input is missing:
=IF(A1="", "", A1*B1)The cell looks empty until A1 has a value. To blank out errors instead, use =IFERROR(B1/A1, ""). Note that "" is text, so ISBLANK on that cell returns FALSE; test it with =A2="" instead.
Why Keep a Cell Blank with a Formula?
There are a few reasons why you might want to force a cell to remain blank in Excel using a formula:
- To avoid displaying a zero, error message, or other unwanted value when a formula result is empty
- To hide interim calculation results or suppress the display of values in certain situations
- To create a cleaner, easier-to-read spreadsheet by strategically leaving some cells empty
- To conditionally hide data based on user inputs or other cell values
- To make printouts or exported versions of your spreadsheet more user-friendly and less cluttered
Keeping a cell blank with a formula gives you more control over what is displayed in your Excel worksheet, allowing you to tailor it to your needs. It’s a handy trick to know for improving the usability and appearance of your spreadsheets.
Method 1: Using the IF Function
One of the most straightforward ways to keep a cell blank based on a formula is to use the IF function. The IF function allows you to test a condition and return one value if the condition is true, and a different value if it’s false.
Here’s the basic syntax:
=IF(logical_test, value_if_true, value_if_false)To force a cell to stay blank with a formula using IF:
- Select the cell where you want to enter the formula
- Type =IF(
- Enter the logical test that determines if the cell should be blank. For example, you could test if another cell is empty using a formula like A1=””
- After the logical test, type ,””, to return a blank (empty string) if the test is true
- Finally, enter a value or formula to display if the logical test is false, followed by a closing parenthesis.
Here’s an example formula that will keep a cell blank if A1 is empty, otherwise display the value from A1:
=IF(A1="","",A1)You can replace the final A1 in this formula with any other value, reference, or formula to display when the cell isn’t blank. This gives you a lot of flexibility in controlling when the cell stays empty and what shows up when it’s not.
For instance, you could use a more complex logical test, like:
=IF(OR(A1="",B1<0),"",A1*B1)This would keep the cell blank if either A1 is empty or B1 is negative, otherwise it would display the product of A1 and B1.
Method 2: Using the ISBLANK Function
The ISBLANK function is another helpful tool for checking if a cell is empty and returning a blank if so. ISBLANK returns TRUE if the referenced cell is empty, and FALSE if not.
To keep a cell blank with a formula using ISBLANK:
- Select the cell for your formula
- Type =IF(ISBLANK(
- Enter a reference to the cell you want to check, like A1
- Type ),””
- Add a comma, then the value to return if the cell isn’t blank
- Type a closing parenthesis
For example:
=IF(ISBLANK(A1),””,A1)
This will keep the cell blank if A1 is empty, and display A1’s value if not. You can replace the final A1 with any value or formula to display when not blank.
Using ISBLANK is a straightforward way to check for empty cells and selectively display blanks based on that. It’s especially useful when you want to suppress display of zeroes or other values that would appear when a cell is empty.
For example, suppose you have a formula that calculates an average like this:
=AVERAGE(A1:A10)If some of the cells in A1:A10 are blank, they’ll be ignored and the average will be calculated using the remaining values. However, if ALL the cells are empty, AVERAGE returns a #DIV/0! error, because there is nothing to divide by.
ISBLANK can’t catch this, because it only checks whether a cell is empty, not whether a formula returned nothing. Check the inputs with COUNT instead:
=IF(COUNT(A1:A10)=0, "", AVERAGE(A1:A10))Now the cell stays blank until at least one number is entered in A1:A10.
Method 3: Embedding Blank Formulas
Another option is to directly embed a blank return “” in another formula using IF. This is useful for suppressing zero or error values.
For example, say you have a formula like this in cell A2:
=B1/A1
If A1 is blank, A2 would display a #DIV/0! error. To avoid this and force A2 to be blank if A1 is empty, use:
=IF(A1="","",B1/A1)No errors, just a blank cell when the formula has no valid input. This can neaten up your spreadsheet and avoid distracting error messages.
You can do the same thing to hide zero values:
=IF(B1/A1=0,"",B1/A1)Now if the formula results in zero, a blank will display instead.
Embedding IF statements within your formulas like this gives you pinpoint control over when individual cells display blanks, without having to modify the cell formatting or create additional helper columns.
Method 4: Using IFERROR
The IFERROR function is helpful for trapping and hiding Excel formula errors and displaying a blank instead. It’s a bit like a more specialized version of the IF function.
IFERROR syntax:
=IFERROR(value, value_if_error)
To keep a cell blank if a formula results in an error:
- In the cell, type =IFERROR(
- Enter your formula that may return an error
- Type ,””
- Close the parentheses
Example:
=IFERROR((A1+1)/10,””)
Now if the formula causes an error, the cell will display a blank instead of an ugly error message. This is cleaner and more user-friendly than letting errors show.
You can also combine IFERROR with other functions for even more control. For instance:
=IFERROR(IF((A1+1)/10=0,"",(A1+1)/10),"")This will display a blank if the formula returns either zero or an error.
IFERROR is a quick and easy way to hide errors and keep your spreadsheet tidy, without a lot of extra functions or formatting.
Blank vs Empty String
It’s important to note that a blank cell is not the same as an empty string in Excel. A truly blank cell has no value, while an empty string “” is still a value, just an empty text string.
In most cases, using “” will give you the blank appearance you want. However, a cell containing “” may behave differently than a truly empty cell in some situations, like with certain formulas or reference types.
For example, ISBLANK returns TRUE only for truly empty cells and FALSE for a cell containing an empty string “”, while COUNTBLANK counts both. COUNTA also counts “” cells as filled. And if you reference a blank cell in another formula, it will return a zero value, while referencing an empty string “” will return an empty string.
So while both will look blank, it’s good to be aware of the distinction between true blanks and empty strings, and use them appropriately in your formulas.
Hiding Values and Formulas
To make a cell look empty whatever it contains, give it the custom number format ;;;:
- Select the cell and press Ctrl + 1.
- On the Number tab, choose Custom, type
;;;in the Type box, and click OK.
The value is hidden on the sheet and in print, but it still shows in the formula bar when the cell is selected. To hide the formula from the formula bar as well, open Format Cells > Protection, tick Hidden, and then turn on Review > Protect Sheet. The formula keeps calculating.
Blank Cells and Data Validation
A drop-down list created with Data > Data Validation > List starts out blank; Excel doesn’t pick the first item for you. Formulas that depend on the drop-down can use the IF pattern above, such as =IF(B2="", "", VLOOKUP(B2, Prices, 2, FALSE)), so they stay blank until someone makes a choice.
Keep Ignore blank ticked in the Data Validation dialog if the cell is allowed to stay empty. Untick it only when an empty value should be rejected.
Blanks and Conditional Formatting
Conditional formatting is another Excel feature that gives you a ton of control over how your spreadsheets look and behave. With conditional formatting, you can automatically apply different colors, fonts, borders, or other visual effects to cells based on their values or conditions you specify.
For example, you might use conditional formatting to highlight cells above or below a certain threshold, or to color-code categories in your data.
You can also use conditional formatting to change the appearance of blank cells. One common use is to apply a subtle shading or border to empty cells to visually distinguish them from cells with data.
To conditionally format blank cells:
- Select the range of cells you want to format
- On the Home tab, click Conditional Formatting
- Choose New Rule
- In the Select a Rule Type list, pick “Format only cells that contain”
- Under Edit the Rule Description, change the first dropdown from “Cell Value” to “Blanks”. This catches both empty cells and cells whose formula returns “”.
- Click the Format button and set up the formatting you want for blank cells, then click OK.
Now your blank cells will automatically pick up the formatting you specified, making them easy to spot at a glance.
You can use the same general steps to conditionally format cells that aren’t blank too. Just change the rule description to something like “Cell Value” “not equal to” “”.
Combining conditional formatting with blanks is a great way to draw attention to missing data, or to create visual separation between filled and unfilled cells in a spreadsheet.
Final Thoughts
As you can see, there are several ways to keep a cell blank with a formula in Excel depending on your needs. Whether using IF, ISBLANK, embedded blanks, IFERROR, or other functions, you can easily suppress cell contents and tailor your spreadsheet’s appearance.
The methods covered here will let you:
- Keep cells blank based on conditions
- Avoid displaying errors or unwanted values
- Hide formulas for a cleaner look
- Create more user-friendly, readable spreadsheets
- Use blank cells strategically for data validation and conditional formatting
Try out these techniques in your own Excel projects to start enjoying more control over how your data displays! With a little formula magic and some creative formatting, you’ll be able to fine-tune your spreadsheets to perfection.